Overview
Webhooks in CloudFix allow for real-time notifications about saving recommendations. This KBA provides a step-by-step guide on how to configure a webhook in CloudFix and understand the data it returns.
<supportagent>
Agents also have available: Troubleshooting Webhooks
</supportagent>
Information
Configuring a Webhook
1. Go to Settings > Webhook > Add Webhook
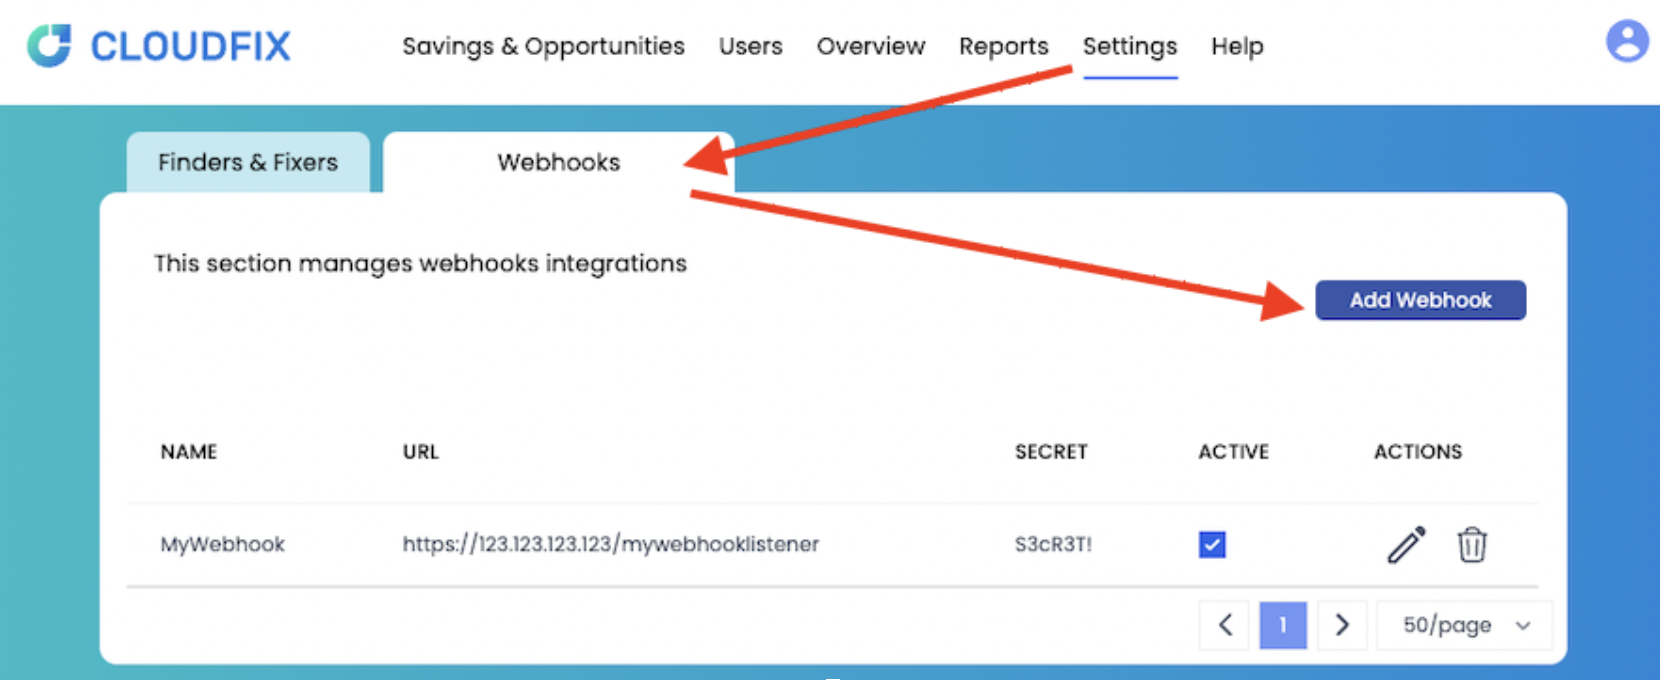
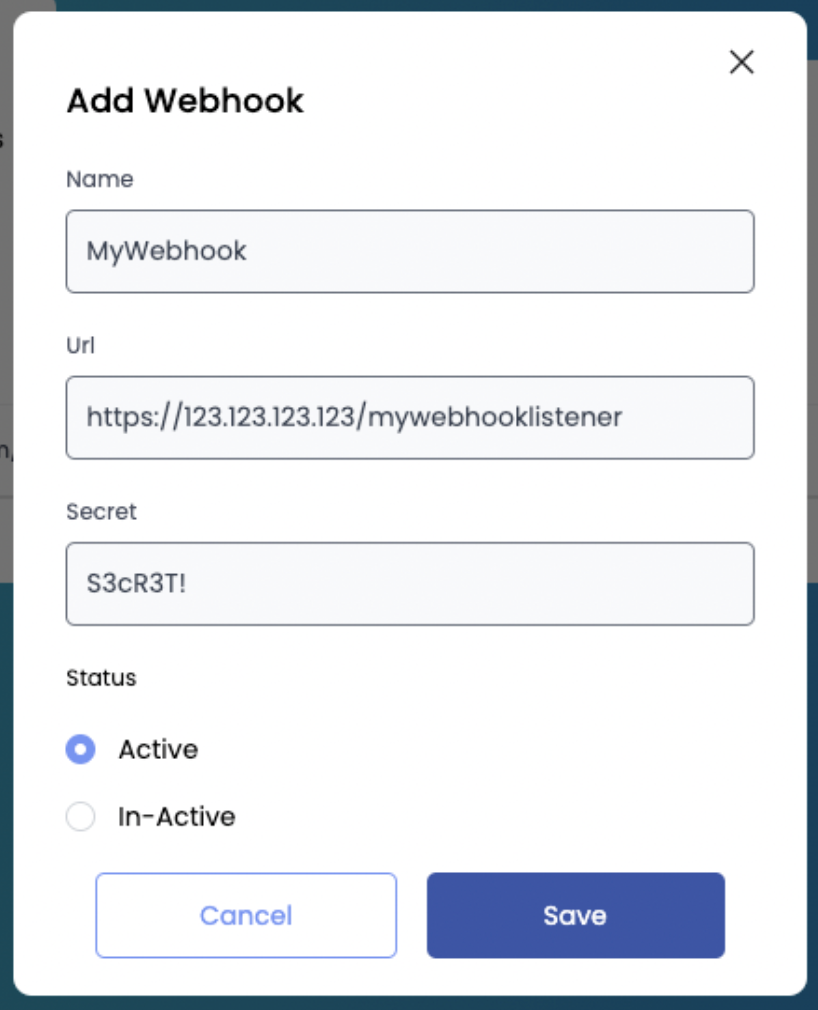
2. In the "Add Webhook" window provide:
- A unique Name for your webhook.
- Specify the URL where your integration will be listening for webhook events.
- Provide a Secret. This is essential to validate that the events received are legit and come from CloudFix and not from a potentially malicious third party.
- Select "Active" status if you want it to be enabled after creation.
NOTE: Webhooks are valid for 180 days after creation. After 180 days they expire and stop working.
When are they triggered?
Webhooks are triggered whenever a new saving opportunity is created or the status of an existing one is updated (Scheduled, In Progress, Completed, Failed, etc.). For more information see Statuses of CloudFix Recommendations
Data Structure:
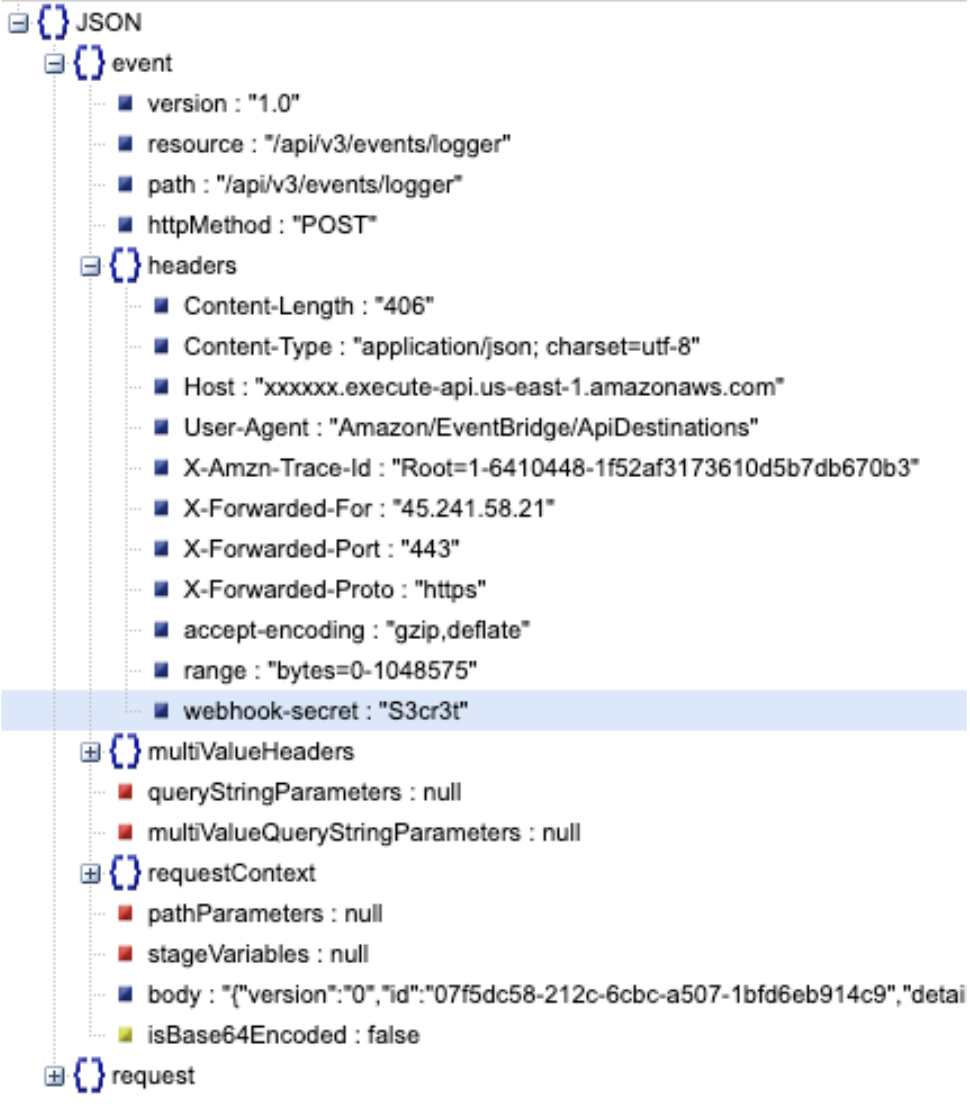
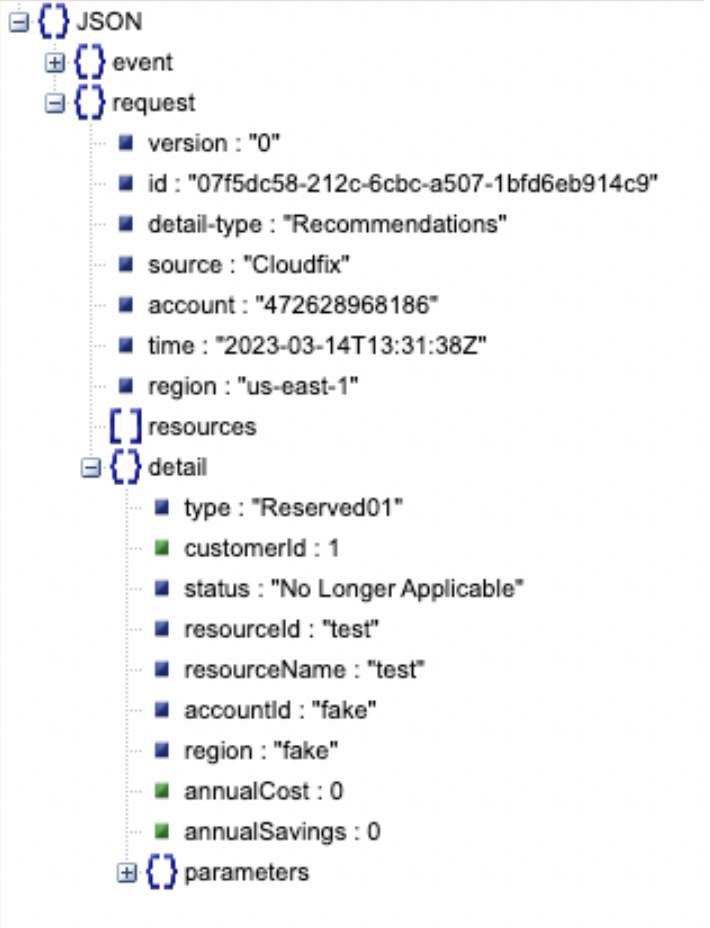
The primary components of the returned JSON when the webhook is triggered are the “event” and the “request” nodes.
- The “event” node contains metadata of the webhook, including headers with the shared secret so you can verify the legitimacy of the event.
- The “request” node contains all details on the new or updated opportunity.
Priyanka Bhotika
Comments